How to Mascara Fan Brush Guide + MAC 205 Mascara Fan Brush Review: An Ode to Mascara Fan Brushes and why you need one.
Why Use a Mascara Fan Brush?
A mascara fan brush seems like an unnecessary product since mascara generally comes with its own wand and lash tools exist to comb out clumps. I felt this way until I used a mascara fan brush myself.
Here is why I love a good mascara fan brush.
BACKSTORY I love dark, thick mascaras but they are difficult to apply well: I love dark blacker-than-black wet mascara but often these formulations are heavy and weigh lashes down too much to hold a good curl. They often are messy and clumpy on application and can flake.
So many mascaras I LOVE upon application are so dark, lush and lovely like:
- Fairy Drops Scandal Queen
- Fiberwig
- Calvin Klein CK One
- Hot Lashes Mascara
- Too Faced Better Than Sex Mascara
- Dior DiorShow
- Tarte 4 Day,
- Benefit BadGal
All these mascaras give lashes OOMPH. But I must apply them too heavy handedly because my mascara looks way too obvious and fake no matter how much I clean off the wand before application.
I like a thick lush lash, but somewhat natural looking. Or at least not multi-lash stuck together clumpy disasters.
So while lash tools,combs, and mascaras with special wands are quite useful, they rarely give even application of mascara, and generally cannot create the look of individual lashes, combs generally leave at least some lashes stuck together.
SOLUTION: To solve this beauty dilemma, use a Mascara Fan Brush to de-clump and apply these lovely dark, thick, wet mascaras smoothly and clump-free for wispy, fluttery, long, dark THICK lashes – even on your tiny lashes.
How to Find a Quality Mascara Fan Brush
There is a range of fan brushes on the market from a basic drugstore beauty chain store fan brush to the $65 Barney’s Claudio Riaz Lash Touch Brush. A good quality one is the MAC 205 Mascara Fan Brush for $20.
Mascara Fan Brushes can individually “paint” and coat each tiny or long lash separately for AMAZING definition of your lashline. Each lash stands out with no clumping yet appears naturally dark and long and thick.
About The MAC 205 Mascara Fan brush
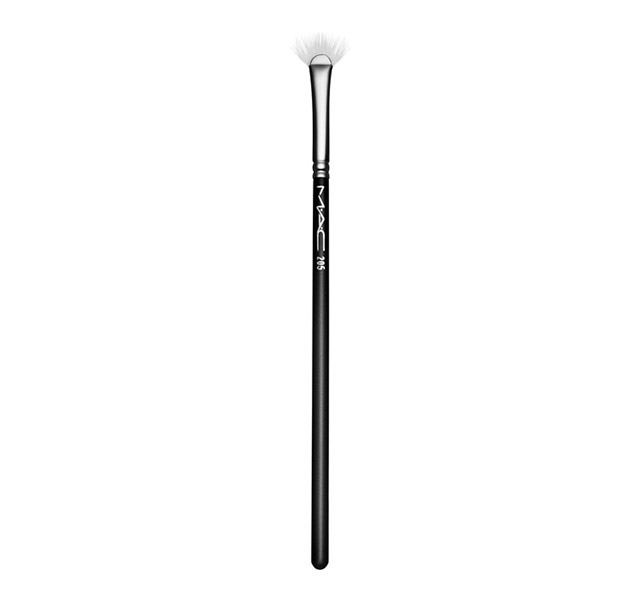
MAC 205 Mascara Fan Brush
The MAC 205 Mascara Fan Brush is frequently used by bridal makeup artists for a few reasons:
- to create wispy lower lashes
- to coat mascara onto to the top lashes for those lowered lid bridal photo shots
- to better blend false and real lashes together with mascara application
- to apply mascara to individual fake lashes without disturbing their placement
- for all day, clump-free lashes that do not require touch-ups.
This brush is probably 40% smaller than competitor mascara fan brushes such as the Paula Dorf, and has tiny soft wispy guard bristles that make it easier to remove clumps and create feathery lashes.The MAC is:
- Easier for those with the steady hands of a true makeup artist than a clumsy makeup fanatic like myself to use.

MAC 205 Mascara Fan Brush Bristles
But a little practice went a long way and now I can always get a good application the first time, which reduces the time I spend declumping and combing excess mascara upon application (but keep q-tips at the ready). This reduces how much reapplication or clean-up of mascara I do when touching up my makeup.
- Notice the longer and shorter bristle lengths in the photo to the right. When using the MAC 205, try to load the mascara onto the shorter fan bristles, not the longer guard bristles.
HOW TO DO IT: Do this by bending and holding the longer guard bristles away from the shorter bristles with your finger while only coating the short bristles with mascara. This way, you can apply the mascara with the short bristles and comb out clumps and direct the lashes with the longer bristles.
Best Use LEARNING CURVE – it takes practice
Mascara Fan Brushes take a bit to get used to, mostly how to wiggle it into your lash line without being too heavy-handed to spread the product evenly.
But once you get the technique down, it lasts for the day without touchups and goes much faster than traditional wand application and de-clumping.
In the photo seen above, this was Calvin Klein CK One Mascara, a thick black mascara that stays put but is too heavy to apply directly from the tube.
In this photo, I did a quick running-out-the-door-I-am-late, 30 seconds for both eyes, didn’t have to de-clump much (although I see one clumpy spot on my lower lashes I could have fixed) and I didn’t have to reapply at all during a 13 hour day. No real flaking during the day either or undereye cleanup.
While the Mac Mascara fan brush can do a perfect application within a few minutes, this photo is a realistic every day quick use of a THICK BLACK mascara applied with the brush with some practice.
HOW TO USE A MASCARA FAN BRUSH
- Comb through your lashes with a clean lash brush spoolie or lash comb, especially if you have curly lashes or flat lying lashes. Curl lashes now if desired.
- Sweep the wand of your favorite over-the-top wet, dark mascara against the tip of your mascara fan brush to deposit enough mascara for one eye. Brush away any obvious clumps. Start with less than you think you need, you can always add more.
- Begin with your upper lashes and lightly touch the fan bristles horizontally to the center of the root lash line, depositing some product. Then wiggle it into the lash root and comb through in one stroke, gently pushing that color out along the length of the lashes, taking your time, lightly painting your lashes up and out. Comb through with a clean spoolie if you use too much product or have any lashes stuck together. You can also separate lashes any stuck together wiggling the brush vertically as well.
- Repeat the same procedure with the lashes on the outer corner, applying in vertical strokes where necessary to catch all the lashes. Then proceed to do the same the inner corner lashes
- Check your upper lashes for any clumps or stuck lashes, use a spoolie if needed or lash brush. If mascara got on the waterline unintentionally, clean up with a q-tip.
- Do the other upper lashes of the other eye
BEGINNER’S Best Use Fan Brush TIP
If you do not have a steady hand, hold the fan brush bristles close to the lash base, and slowly blink your lashes over and through the bristles to paint on the product.
HOW TO USE A MASCARA FAN BRUSH ON LOWER LASHES
- Assess if more product is needed on the fan brush before beginning lower lashes
- Use the apply-to-root technique described above, then wiggle it into the lash root and comb through in one stroke. Comb outside lashes outward, comb middle lashes straight down, and comb the inner lashes inward for the most natural, doe-eyed look.
- Clean off the fan and do a quick final comb through for any clumps from underneath the lashes.
- Assess if you want another coat.
- Clean your brush immediately (or at least later that day), because it will get stuck and gunky quickly.
Where to find the MAC 205 Mascara Fan Brush
- MAC Cosmetics Online, $20, free shipping & samples
- At eBay, around $20 – $40
- On Amazon, third party seller