• Ingredient Glossary & Guides
    • The Best Beauty Ingredients You Will Love Glossary Guide
    • Skincare Ingredient Guides
  • Beauty
    • Better Beauty Sleep
    • Beauty Expert Advice
    • Clean Beauty
    • Cosmetics
    • How to…
    • Discontinued Clinique
    • Makeup Tools & Brushes
    • Science of Beauty
  • Haircare
    • Hair Growth
    • Hair Growth Devices
    • Hair Maintenance Products
    • Hair Styling Tools
    • Haircare Tools
  • Skincare
    • Adult Acne
    • Anti-Aging
    • Skin Devices & Topicals
    • Skin Tools & Devices
    • Science of Skincare
    • Waterless Beauty
  • Contact
  • About
    • About Our Features: How Our Product Reviews are Unique
    • Disclaimer
    • Disclosures
    • Privacy Policy
    • Terms of Use

Style Chicks

Expert Beauty Reviews | Skincare Ingredient Guides

You are here: Home / Archives for Beauty / How to...

How to Tutorial Guides

How to Guides


How to guides, tutorials, and step-by-step directions. Beauty tips and hacks for the best mascara application, How to correctly use Yves Saint Laurent Touche Eclat, How to clean makeup brushes, How to use a mascara fan brush, etc.

How to Mascara Application Hack For Applying Wet Formula Mascaras

August 25, 2017 · 8 Comments

Wayne Goss has such great makeup application techniques and recently gave this simple but highly useful tip for How to Mascara Application Hack For Applying Wet Formula Mascaras:

bend the mascara wand before completely pulling it out of the tube, so the wand is at an angle.

Angled mascara brushes are not a new concept, some mascara brands even have built-in angled brushes. The angle does make an impressive difference in both control of where you apply the product and importantly, how much produce is distributed, especially getting in nice and close to the lashline.

Watch Wayne’s How to Mascara Application Hack For Applying Wet Formula Mascaras technique in this video:

[embedyt] https://www.youtube.com/watch?v=txZsw-ENMzk[/embedyt]

Our Experience

We tried the Mascara Application hack for ourselves, and it is actually pretty amazing on getting mascara right in close at the lash line, especially on the lower lashes, the shorter “arm” to the handle makes a difference in how much control there is in the application.

STYLECHICKS ADDITIONAL SUGGESTIONS

Three additional suggestions to make the most of this mascara application hack:

Bend a disposable mascara wand for optimal control and to get in close on bottom lashes

  1. Use Disposable Wands: Instead of using the wand that comes with your mascara, use disposable mascara wands. They are very inexpensive at places like Amazon and Sallys Beauty Supply (under $10 for like 200 of them). The disposable wands are a cheaper plastic and often more flexible, thereby less subject to breaking off the wand head by accident. This way, you can bend your wand without fear of breaking it off and getting stuck, leaving you with no cap for your mascara.
  2. Try angles other than just a 70 to 90-degree angle: You can shape the brush of your disposable mascara wand into other shapes including a c-shape to reinforce the curling capability of your wand.

    Curve a disposable wand into a c-shape to enhance the curl of top lashes

  3. FAN YOUR LASHES OUT. It is easier to manipulate the thin brush handle of a disposable wand between your fingers, so let the brush do the work to reduce smudges and fan out lashes. Rotate the thin arm between your forefinger and thumb to move the brush head so that the angle faces outward instead of inward in order to “fan out” the outer lashes, then give them one last brush forward.
  4. CLEAN UP: You can even follow up with a clean disposable mascara wand for combing out any clumps or to get the direction of lashes just the way you would like it. Just hold the clean wand in front of your lashes and blink through the comb to remove clumps.

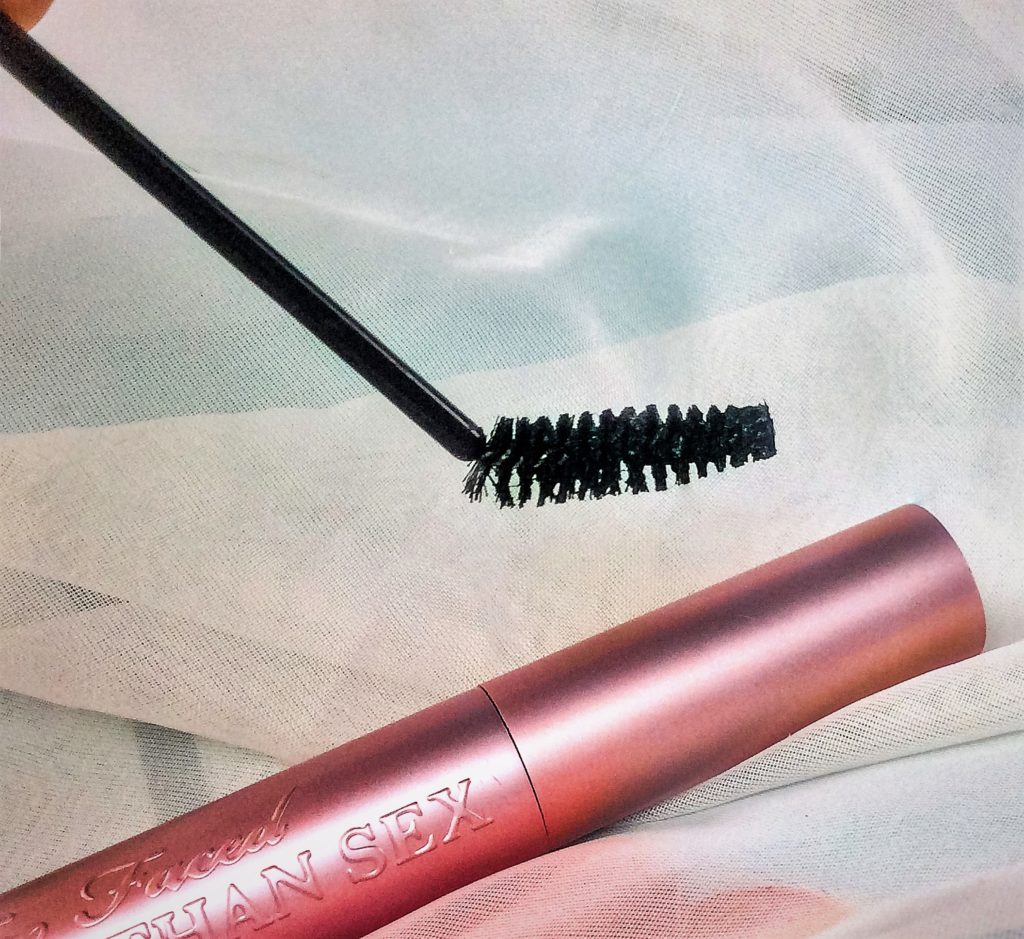
SIDE BONUS: Disposable mascara wands give much better control and product distribution for very wet mascaras or mascaras with fibers such as Too Faced Better Than Sex, Benefit BADgal, DiorShow, and Urban Decay Perversion Mascaras, to name a few.

Wet mascaras like Benefit BadGal and UD Perversion apply more evenly but with all the glamour when using a bent disposable mascara wand

Got any good mascara application tips to share? Tell us in the comment section below!

How to Mascara Application Hack For Applying Wet Formula Mascaras Supply Resources

  • Wayne Goss‘ YouTube Channel
  • Disposable Mascara Wands:
    • Face Secrets Silicone Disposable Mascara Wands come in a variety of wand shapes for thickening, lengthening, curling, and close tip work application, $3.29 at Sally Beauty Supply
    • G2PLUS 100 Disposable Mascara Wands, at Amazon

Posted by Style Chicks / Filed In: Cosmetics, How to...
Tagged: How to Apply a Wet Mascara, Mascara Application Hacks, Mascara Hack, Too Faced Better Than Sex Mascara, Wayne Goss

How to Best use Yves Saint Laurent Touche Eclat

May 7, 2017 · 1 Comment

Yves Saint Laurent Touche Eclat is an iconic beauty product. A brightener and anti-aging wonder. But are you using it correctly? Read these tips to find out.

Learn the Secret Hacks for YSL Touche Eclat

Learn the Secret Hacks for YSL Touche Eclat

HOW YSL TOUCHE ECLAT WORKS

Ever watch a makeup artist “age” someone for a movie role? They add lines of a dark grayish brown darkness to select areas of the face to make it appear sagging, hollowed and haggard.  Touche Eclat can be used to do the opposite by adding peachy light to these same areas. Touche Eclat brightens without being shimmery or glittery.

HOW TO Best USE YVES SAINT LAURENT TOUCHE ECLAT

Some of my favorite tips include:

  • ANTI-AGING: Subtle signs of aging are excess darkness on some areas of the face, a light application of Touche Eclat counteracts this:
    • Applying a light upside-down “U” shape in the indentation of the chin
    • Applying it under the nostrils where many of us get broken red capillaries, to lift the nose, which tends to droop with age
    • Apply it to the sides of the mouth where they turn down to lift drooping lips
    • At the arch of the eyebrow, blend a dot of Eclat into that highpoint.
    • CONCEAL LAUGH LINES: Smile and draw over the lines with the Eclat. Blend to hide the lines.
  • SMOKEY EYE CLEANUP: If your smokey eye has become too dark, clean it up a bit with some eclat on the highlight section. This cleans up and lightens your look without disturbing that otherwise hard-earned blended smokey look on the rest of the eye.
  • FOR THE UNDEREYE:  If you have little in the way of dark circles, Touche Eclat is enough to brighten under the eye, but if you have something to cover, you will need more than Eclat for actual coverage. I like to use my standard foundation or concealer, and then dab a TINY bit of Eclat on top of that for some brightening. If you brighten the entire circle, there is no natural contour to your undereye, which looks old and weird. But less is more when it comes to undereye Eclat use.
YSL Touche Eclat on smile lines makes them visually disappear

YSL Touche Eclat on smile lines makes them visually disappear

Tips from Wayne Goss, YouTube makeup artist

Wayne Goss has an excellent video that explains the dos and don’ts of Touche Eclat and shows how to use Touche Eclat to do the following:

  • SLIM THE NOSE: Draw a vertical stripe down the bridge of your nose makes it appear straighter
  • LIFT THE EYEBROW: Draw a line atop each eyebrow
  • ADD LIGHT: Apply to your lower forehead and feather the product upward to help draw light to your face
  • AWAKEN EYES: A spot in the inner-corner of the eye will make you appear more awake and looks more natural than shimmery white shadow
  • TOP OF THE CHEEKBONE: Just below where you do your concealer, highlight the top of the cheekbone for more light and definition.
  • MAKE LIPSTICK POP: after putting on lipstick, lightly apply Touche eclat to the outside areas of both your top and bottom lip as well as the cupid’s bow, to pull focus and definition to the mouth

See Wayne Goss demonstrate how to use YSL Touche Eclat:

Posted by Style Chicks / Filed In: Cosmetics, How to...
Tagged: Anti-Aging, How to use Touche Eclat, Radiant Touch, Touche Eclat, Wayne Goss, YSL Touche Eclat, Yves Saint Laurent Touche Eclat

How to Best Use Hyaluronic Acid: What to Know

February 24, 2017 · Leave a Comment

Like an Instagram Filter for real life, Hyaluronic Acid plumps wrinkles & pores with intense hydration, making skin appear instantly youthful & dewy.

Why We Love Hyaluronic Acid

Hyaluronic Acid is by far one of our favorite skincare ingredients; we always look for it in serums and moisturizers because it makes skin look fantastic as it plumps out wrinkles and crinkles and makes skin glow.

But Hyaluronic Acid won “beauty secret weapon” status in our StyleChicks Favorite Skincare Ingredients Series because it helps any anti-aging active ingredient work more efficiently. Learn about the short term and long term benefits of Hyaluronic Acid.

WHAT IS HYALURONIC ACID?

Hyaluronic Acid occurs naturally in the skin, but it depletes as we age, and the body does not make more.

Topical Hyaluronic Acid application in the form of a cream, gel or serum replaces levels in the skin, giving a youthful glow.

WHAT HYALURONIC ACID DOES

Hyaluronic Acid gets “beauty secret weapon” status due to its’ ability to hold enormous amounts of moisture; it can draw moisture from the air, sucking it into the skin.

This moisture drawing ability has a dual benefit:

  1. It makes skin as plump and dewy as possible, creating an environment where the skin contains as much hydration as it can hold.
  2. It uses this water drawing ability to pull active ingredients deeper into the skin.

BENEFITS OF HOLDING MOISTURE

  • Wrinkles, fine lines, and pores temporarily “plump out” from all the moisture until they are barely visible, yet it does not make the skin seem puffy or bloated.
  • Hyaluronic Acid works wonders on crows feet, eleven lines, wrinkles on and around the mouth, forehead lines, and smile lines.
  • Hyaluronic Acid causes an optical blur effect, smoothing tiny imperfections in skin including on the throat, chest, and decolletage

What Active Ingredients to Pair HA With

Hyaluronic Acid SERVES AS AN ACTIVE INGREDIENT BOOSTER.

Many active ingredients that are amazing for the skin all do their best work in the deeper layers of the skin, but their molecules are typically too large to absorb deeply. Some examples are:

  • MSM
  • Vitamin C
  • Retinol
  • Peptides
  • B3 (Niacinamide)
  • Sea Buckthorn Oil

The solution? Hyaluronic Acid is like a friend with VIP access; it uses its’ moisture pulling ability to draw these active ingredients into deeper skin layers. The deeper active ingredients can work, the better the collagen production.

This means deep discoloration, sun damage, and acne scars are all fade for a much clearer look to the skin. And when collagen production happens at a deeper level, it better supports for skin, resulting in less sagging.

How to Best Use HYALURONIC ACID

It is imperative to use a moisturizer over your Hyaluronic Acid, as it draws as much moisture as possible into the skin.

If Hyaluronic Acid can’t get enough moisture, the surface of the skin can appear DRY, because the Hyaluronic is still “thirsty.”

I like to apply Hyaluronic Acid over damp skin; sometimes I mix a Hyaluronic cream or serum with some water before applying it to my face and eye area.

  • Less is more. Apply more only if needed, focusing on wrinkles, pores on the cheeks, and the wrinkles on the forehead and throat.
  • Apply Hyaluronic Acid over a Vitamin C serum or Peptide Serum to maximize your results
  • Do you use an at-home device such Handheld Light Therapy or the NuFace? Optimize the results by applying a layer of Hyaluronic Acid after washing off the conductive cream.
  • If you live in an area with higher environmental pollution, consider only using Hyaluronic Acid at night so that it does not pull the pollutants into your skin from the air.

Hyaluronic Acid serums we like

  • Aurora Cure Ultimate 100% Pure Hyaluronic Acid Serum: Professional Strength: a clear serum, not sticky, very potent, as it is 100% Hyaluronic, no fillers. I like to apply this during the daytime after I wash my face and it is still moist, I lightly apply the Hyaluronic, then pat on two light coats of moisturizer (Clinique Dramatically Different for example) and spritz my face with water in between layers to lock in hydration. Also very useful paired with a Vitamin C serum, but make sure to add a moisturizer on top!
  • SERUM CEUTICALS ALBUMIN & HYALURONIC ACID SERUM This is not a straight Hyaluronic, but the Albumin and Hyaluronic pairing together work wonders at reviving tired, older looking skin, and this has no chemicals or preservatives. Cool feature: this can be used ON EYELIDS (!!) without causing irritation.
  • It is amazing when applied to the throat, the face, jowls, on the shoulders, hands, and decolletage, use sparingly around the eyes. When it is applied, enlarged pores disappear, forehead wrinkles appear practically non-existent.

Ingredient overview Summary

Did you like the article How to Best Use Hyaluronic Acid: What to Know?  Then you may also like:

  • Why We Love Using Konjac Acid with Hyaluronic Acid
  • How Aloe Vera Can Make Your Skin Collagen Better

Know a Hyaluronic Acid that should be on this list? Contact us or tell us about it in the comment section below!

Posted by Style Chicks / Filed In: How to..., Ingredient Guides
Tagged: Anti-Aging, Favorite Skincare Ingredients Series, How to Use Hyaluronic Acid, Hyaluronic Acid, Skin care, Skincare, Wrinkles

How to get smooth feet: UTILYZE Electronic Foot File

January 17, 2017 · 2 Comments

There are many callus removal and rough foot skin treatments including salon treatments, chemical concoctions, and even garra rufa, a fish pedicure where fish eat the dead skin off the feet! But smooth, callus-free feet are easily achieved at home with the right tool. We like the Utilyze Electronic Foot File, a powerful, rechargeable device for quickly and easily getting soft, callus-free feet with smooth, flake-free heels.

Utilize Electronic Foot File

Utilize Electronic Foot File


SPRING’S ALMOST HERE: TURN FANGLY FEET INTO PRETTY PIGGIES NOW
In winter, it’s easy to hide less-than-glamourous rough and dry feet in warm, thick socks and forgiving, snuggly boots. But as of this writing, spring is only two months away, and foot-flaunting open-back shoes and sandals come with it. And if a vacation to a warm weather locale is in your immediate future, getting your feet smooth and callus-free is a priority.

Utilize Electronic Foot File

Utilize Electronic Foot File


TESTING THE UTILYZE ELECTRONIC FOOT FILE

I charged the device for eight hours before use; it plugs in by the included USB port charger. Once the light turns green, it is ready for use. I went to work on my callus and cringe-worthy dry heels.

I am frequently barefoot at home and have calluses on the outer side of my big toes. I tend to procrastinate on removing these calluses because it’s tediously time-consuming filing away with sanding file sticks or pumices, and the results are often just okay despite filing until my arm gets too tired. But the removal process is simple with the Utilyze Electronic Foot File. I used the File two ways by doing one big toe callus completely dry and the other big toe callus after soaking my foot to soften the callus. Both worked very well.


Utilize Electronic Foot File

Utilize Electronic Foot File


Some things I especially appreciated:

1) POWERFUL: Utilyze Electronic Foot File is a very powerful callus remover, but if you press the roller too hard to the skin, the motor stops. I like this feature so that the skin itself does not get damaged and there is no burning sensation from overuse.
2) EASY GRIP: It is very easy to grip and to use, my hand and arm do not get tired when using it.
3) FAST RESULTS: It is much quicker than using a manual file or pumice with far superior results
4) SAFETY: It is safer and more sanitary than other means of callus removal such as razors or grinders that cut the skin. It is CE international safety standards approved.
5) COMFORTABLE TO USE: It doesn’t feel hot to the touch during use, and it isn’t painful or uncomfortable to remove the dead skin.
6) EASY TO USE: With a manual sander or pumice stone, I used a lot of “elbow grease” to get the job done. But this device just requires a light, gentle glide over the skin. There is no need to rub or scrub, press or push the roller into the skin; the device does all the work.
7) LONG-LASTING CHARGE: So far the one charge has lasted through a few sessions and has retained the same level of power.


Utilize Electronic Foot File

Utilize Electronic Foot File


RESULTS:

Utilyze Electronic Foot File made quick work of smoothing my heels; that happened quickly in a few minutes. The callus removal I did in two sessions, using the fine roller. Not being familiar with the device at first, I didn’t know if the skin could use a rest, but it probably could’ve been done in one session. So far, the calluses have not returned, and my feet stay smooth after a very quick treatment. I also lightly glided it over the soles of my feet and toes to remove general dead skin.

The results were better than I got from the decadent foot soak and pedicure treatment that came with a full spa day of beauty pampering at a very expensive salon. As relaxing as a spa foot treatment can be, I prefer having my own filing device to eliminate any risk of infection.

I was also surprised at *how* much dead skin exfoliated so quickly into a fine powdery dust, so make sure to use the device somewhere it is easy to clean up afterward or drape a towel, drape cloth or old newspapers under your feet.

Utilize Electronic Foot File

Utilize Electronic Foot File


BOX CONTENTS:
The device comes boxed with the rechargeable file itself, instructions, a USB port charger, one fine roller and two coarse rollers, a roller cover cap, and a cleaning brush. The color choices are red or black.

Replacement rollers are available at Amazon when they eventually need to be replaced, but they are pretty solid and clean up well.


Utilize Electronic Foot File

Utilize Electronic Foot File


CONSTRUCTION:
The device is well constructed with sturdy materials; it is suitable for professional use. There are no loose or shoddy parts. I like that it’s rechargeable so that it is a sealed device instead of requiring batteries. It comes with a three-year warranty program.

It is easy to switch out the roller heads by pressing the button on the side which releases the current roller.


Utilize Electronic Foot File

Utilize Electronic Foot File

CLEANING THE DEVICE:
There is a small brush included in the kit to remove any dry skin dust debris from small crevices, and the roller quickly washed off under a running faucet.

CONCLUSION:
The Utilyze Electronic Foot File is a very powerful callus remover, suitable for men and women that gets the job done!

It is an easy, enjoyable beauty treatment that provides instant gratification of smooth, softer foot skin. It smoothes tough callused feet to as soft as silk.

Unlike hand-held foot files, The Utilyze Electronic Foot File gives very effective results and leaves my feet soft enough to ensure against snagging expensive hosiery or trouser socks. It also leaves feet smooth enough to go bare foot or wear strappy sandals. Better results than I got at the spa!

Find the Utilyze Electronic Foot File at https://www.amazon.com/UTILYZE-Rechargeable-Electronic-Pedicure-Turbo-Boost/dp/B00QXHH5Z2/.

[embedyt] http://www.youtube.com/watch?v=2APaJosz6tY[/embedyt]

I received this product in exchange for my unbiased review and received compensation for my time and effort. However, my experience with the product and the opinions expressed in this review are 100% mine.

Posted by Style Chicks / Filed In: Body, Gadgets, Gym Beauty Bag, How to..., Skincare, Spa Economy
Tagged: Feet, How to get smooth feet, How to get smooth feet: UTILIZE Electronic Foot File, Skin

  • Newer Entries
  • 1
  • 2
  • 3
  • 4
  • 5
  • …
  • 10
  • Previous Entries

Search Style Chicks

Pages

  • About the Style Chicks
  • Contact Us
  • Discontinued Clinique Products Guide Lost Clinique You Love
  • The Best Beauty Ingredients You Will Love Glossary Guide

Review + Guide Topics

  • Accessories
  • Adult Acne
  • Anti-Aging
  • Beauty
  • Beauty Expert Advice
  • Beauty Tools + Devices
  • Better Beauty Sleep
  • Black Friday & Cyber Monday
  • Body
  • Clean Beauty
  • Cosmetics
  • Curly Hair Care
  • Decor
  • Discontinued Products
  • Entertaining
  • Essential Oils
  • Exercise
  • Fashion
  • Featured
  • Food
  • For the Home
  • Fragrance Free
  • Gadgets
  • Gifts
  • Green Beauty
  • Gym Beauty Bag
  • Hair
  • Hair Care Devices & Tools
  • Hair Growth
  • Hair Growth Devices
  • Haircare
  • Health
  • How to
  • How to…
  • Ingredient Glossary
  • Ingredient Guides
  • J-Beauty
  • Jewelry
  • K-Beauty
  • Life Hacks
  • Lifestyle
  • Makeup
  • Makeup Tools & Brushes
  • New Products
  • News
  • Organic
  • Pre-Shampoo Hair Treatments + Conditioning Remedies
  • Product Review
  • Product Updates
  • Science of Beauty
  • Science of Skincare
  • Sensitive Skin
  • Sephora
  • Shoes!
  • Skin Tools & Devices
  • Skincare
  • Spa Economy
  • Style
  • Tea
  • Technology
  • Things I want
  • Travel
  • Unscented
  • Vanity Table
  • Waterless Beauty
  • Weddings

Welcome to Style Chicks

Since 2007, we are your trusted source for expert hair and skincare reviews, in-depth ingredient guides, and info on hard-to-find and discontinued beauty products. Whether you're looking for smarter skincare choices, hair growth options, clean beauty cosmetics reviews, ingredient glossary, better beauty sleep, hair care tips, beauty how-to guides or trying to track down your holy grail favorite, we’ve got you covered.


Copyright © 2007 - 2025 STYLE CHICKS